
Oil Pastel Art – A Complete Beginner-Friendly Guide
1. Introduction to Oil Pastel Art
Oil Pastel Art is one of the most vibrant and beginner-friendly art forms loved by artists of all levels. Oil pastels are pigment sticks combined with a non-drying oil and wax binder, making them smooth, creamy, and incredibly versatile.
Whether you’re a student exploring new mediums or a professional looking for expressive textures, Oil Pastel Art offers endless creative possibilities. Its flexibility and bright colors make it a favorite among both beginners and experienced artists.

2. A Brief History of Oil Pastels
Oil Pastel Art has an interesting origin. The first form of oil pastels appeared in the early 1920s, but it was in 1949 when the famous brand Sennelier created high-quality oil pastels for the legendary artist Pablo Picasso.
Picasso wanted a medium that offered bold colors, smooth blending, and the richness of oil paint without the mess. This request transformed oil pastels into a respected medium, inspiring generations of artists to explore Oil Pastel Art.
3. Why Oil Pastels Are Unique
What makes Oil Pastel Art truly special is its distinct texture and effortless blendability. Unlike crayons, oil pastels have a soft, oily composition that allows for smooth color transitions. And unlike soft pastels, they don’t create dust or require a fixer to stay on the surface.
The bold pigmentation, thick application, and ability to layer colors make Oil Pastel Art perfect for expressive painting, quick sketches, and mixed-media creations.
4. Essential Tools & Materials
To get started with Oil Pastel Art, you don’t need expensive tools. A few essential materials include:
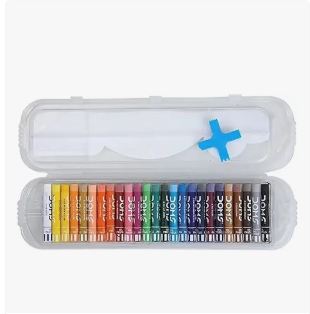
Oil Pastels
Choose your oil pastels based on your skill level and artistic goals.
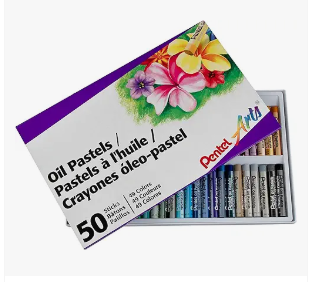
- Student-grade oil pastels are perfect for beginners because they are affordable, easy to blend, and ideal for practicing basic strokes and shading.
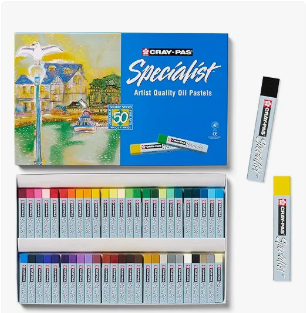
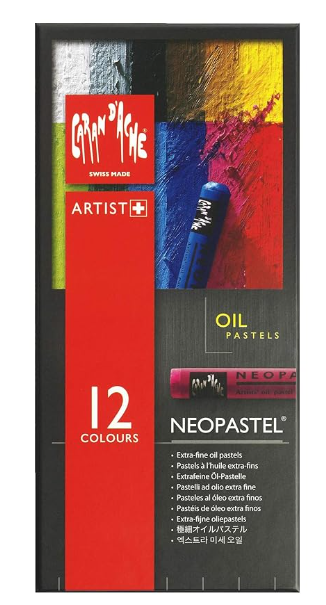
- Artist-grade oil pastels offer richer pigmentation, smoother application, and better layering, making them ideal for advanced Oil Pastel Art techniques.
You can start with a small set and upgrade as you grow comfortable with the medium.
Paper Types
The surface you choose plays a major role in how your Oil Pastel Art will look.
Thick textured paper, pastel sheets, and canvas boards allow the pastels to grip the surface better.
- Pastel paper enhances blending and layering.
- Textured drawing paper adds a natural grainy effect.
- Canvas sheets offer durability and a professional finish.
Avoid thin or glossy paper, as it may tear or fail to hold multiple layers of oil pastels.
Blending Tools
Blending is a core part of creating realistic and smooth Oil Pastel Art. While fingers are the most commonly used tool, there are several other effective options:
- Cotton buds/Q-tips for small areas and soft edges
- Tissues or soft cloth for larger sections and gradient backgrounds
- Blending stumps or tortillons for precise shading
- Baby oil or turpentine with a brush for a paint-like effect
- Palette knives for thick, textured strokes
Experimenting with different blending tools will help you discover which methods work best for your style.
Fixatives (Optional)
A fixative spray can protect your Oil Pastel Art from smudging, dust, and fingerprints.
- Workable fixatives allow you to continue layering even after spraying.
- Final fixatives seal the artwork for long-term preservation.
Always spray lightly and from a distance to avoid altering the colors or texture of your Oil Pastel Art.
5. Basic Oil Pastel Techniques
Mastering the basics will help you level up your Oil Pastel Art and gain confidence in creating smoother textures, richer colors, and more professional-looking results. Here are the essential techniques every artist should practice:
Blending is the most important technique in Oil Pastel Art. You can mix two or more colors using your fingers, cotton buds, or blending stumps to create smooth transitions. Blending helps soften harsh edges and gives a realistic finish to skies, skin tones, and backgrounds. The more you practice, the better your control becomes over color intensity and gradients.
Layering involves applying multiple layers of oil pastels to add depth, richness, and detail to your artwork. Start with light colors and gradually build up to darker shades. This technique allows you to create shadows, highlights, and complex textures—making your Oil Pastel Art look more vibrant and dynamic.
Sgraffito is a fun and creative technique where you scratch the top layer of pastel to reveal the color underneath. You can use a toothpick, needle, or palette knife to carve out fine lines. This method is perfect for drawing hair, grass, patterns, or adding sharp details that stand out against blended areas.
Stippling is all about applying small dots to create texture, shading, or decorative effects. In Oil Pastel Art, stippling works wonderfully for adding grainy textures to landscapes, fur details in animals, or artistic patterns in abstract work. It’s also a great technique for beginners to understand how pressure affects the outcome.
Gradation helps you create smooth transitions between shades, such as a fading sunset or a softly shaded object. Begin with one color and gradually apply another, blending them until the boundary becomes seamless. A good gradation can instantly enhance the depth and realism of your Oil Pastel Art.
Scumbling involves applying a light, broken layer of pastel over an existing layer. This allows some of the bottom color to show through, creating a textured, painterly effect. It’s great for foliage, clouds, and impressionistic backgrounds.
How hard you press the pastel makes a huge difference.
- Light pressure creates soft, transparent layers.
- Medium pressure gives solid coverage without filling the paper’s texture.
- Heavy pressure results in bold, opaque strokes.
Learning pressure control helps you create dynamic contrasts in your Oil Pastel Art.
Unlike paint, oil pastels are mixed directly on the paper. By overlapping two or more colors and blending them, you can create unlimited custom shades. This technique helps you understand color theory better and makes your artwork more personalized.
6. Easy Oil Pastel Art Ideas for Beginners
If you’re new to Oil Pastel Art, it’s best to start with simple and relaxing subjects that help you practice blending, layering, shading, and color control. These easy ideas will not only boost your confidence but also help you understand how oil pastels behave on different surfaces.
Sunsets are one of the easiest and most satisfying subjects in Oil Pastel Art. You can play with warm colors like yellow, orange, pink, and red to create smooth gradients. This helps you practice blending and understanding light transitions.
Basic landscapes such as fields, beaches, forests, and meadows allow you to experiment with multiple colors. They also help you learn depth, foreground-background placement, and simple layering techniques without feeling overwhelmed.
Drawing apples, bananas, roses, or vases is perfect for practicing shading, highlights, and texture. These subjects help you develop control over pressure and layering
These natural elements allow you to explore rough textures, reflections, and different types of strokes. You can practice sgraffito for tree bark, layering for mountains, and blending for water surfaces.
Abstract art is a stress-free way to enjoy Oil Pastel Art without worrying about accuracy. You can draw circles, waves, spirals, or random patterns while exploring colors, lines, and textures. This sparks creativity and builds confidence.
Black silhouettes of birds, cats, deer, or trees placed over a blended background are easy yet visually appealing. They require minimal detail but create a beautiful contrast against colorful skies.
These subjects help beginners experiment with fine lines and repetitive designs. They’re great for practicing patience, hand control, and symmetry in your Oil Pastel Drawing.
These subjects help beginners experiment with fine lines and repetitive designs. They’re great for practicing patience, hand control, and symmetry in your Oil Pastel Drawing.
7. Advanced Techniques for Professionals
Once you’re comfortable with the basics, you can take your Oil Pastel Art to the next level with advanced techniques that offer more texture, depth, and professional-quality finishes. These methods help you refine your style and push the boundaries of what oil pastels can achieve.
• Heavy Layering
Heavy layering involves building up multiple thick layers of color to achieve a deep, painterly effect similar to oil paints. Professional artists use this technique to create bold highlights, intense shadows, and rich textures. Since oil pastels don’t dry, layering allows continuous manipulation, making your Oil Pastel drawing look more vibrant and dimensional.
• Mixed Media
Mixing oil pastels with other mediums opens a world of creative possibilities.
- Watercolor backgrounds can provide soft gradients.
- Acrylic paint adds bold base layers and structure.
- Charcoal or graphite enhances line work and contrast.
Using mixed media in your Oil Pastel Art allows you to create complex visual effects and unique surface combinations not possible with oil pastels alone.
• Textured Backgrounds
Professional artists often work on surfaces that have rich textures such as sandpaper sheets, canvas boards, or handmade paper. These textures grip the pastel better, resulting in expressive strokes and dramatic contrasts. You can even create your own textured backgrounds using gesso or modeling paste. Textured surfaces bring a dynamic energy to your Oil Pastel Art that smooth paper cannot.
• Palette Knife Usage
Using a palette knife with oil pastels gives your artwork a bold, dramatic feel. By applying thick layers and scraping them in controlled directions, you can create sharp edges, textured patterns, and sculpted strokes. This technique enhances the depth and expressiveness of your Oil Pastel Art, making it stand out with a professional finish.
• Solvent Blending
Artists often use turpentine, mineral spirits, or baby oil with a brush to dissolve oil pastels into a smooth, paint-like consistency. Solvent blending helps you achieve ultra-smooth skies, detailed portraits, and realistic water reflections. It’s a game-changer for creating professional-grade Oil Pastel Art.
• Impasto Technique
Impasto involves applying thick layers of oil pastels to create raised, 3D textures on the surface. This approach adds dramatic highlights and dynamic movement to your artwork. It’s especially effective in expressive landscapes, floral artworks, and abstract Oil Pastel Art.
• Underpainting
Some artists begin with an underpainting using watercolor or diluted pastels to block basic colors and shadows. This helps guide the composition and adds depth beneath the top layers. Underpainting gives your Oil Pastel Art a polished, professional base.
• Fine Detailing with Tools
Using tools like needles, scrapers, brushes, and rubber-tipped shapers helps add intricate details that fingers alone can’t create. This enhances precision in hair, leaves, fur, and patterns—making your Oil Pastel Art look more refined and realistic.
8. How to Blend Oil Pastels Smoothly
Blending is the heart of Oil Pastel Art. Here are the best methods:
✔ Finger Blending
The warmth of your fingers gives the smoothest blending effect.
✔ Tissue or Cotton Swab
Perfect for soft, clean gradients without messy hands.
✔ Solvent Blending
Use turpentine, baby oil, or rubbing oil for a paint-like finish. This technique makes Oil Pastel Art look more professional and polished.
9. Common Mistakes Beginners Make
Here are some mistakes to avoid while creating Oil Pastel Art:
- Applying too many layers without blending
- Using thin or glossy paper
- Not cleaning fingers while blending
- Pressing too hard too soon
- Not experimenting with new techniques
Being mindful of these improves your Oil Pastel Art significantly.
10. Tips to Keep Your Oil Pastel Artwork Clean and Long-Lasting
To preserve your Oil Pastel Art:
- Use a fixative spray to prevent smudging
- Store artwork in folders or frames
- Keep tissue paper between pages in your sketchbook
- Frame important pieces behind glass for protection
These simple steps help your Oil Pastel Art stay vibrant for years.
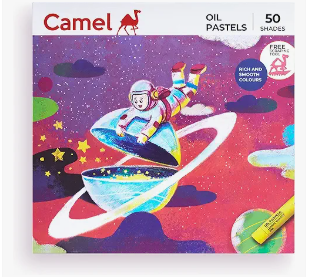
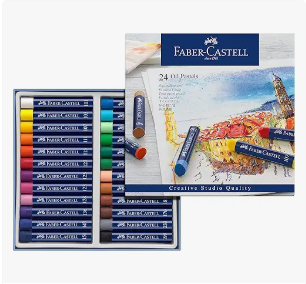
11. Best Oil Pastel Brands to Try
Here are some beginner-friendly and professional oil pastel brands:
12. Step-by-Step Oil Pastel Tutorial (Beginner Friendly)
Here’s a simple tutorial to create your first Oil Pastel Art:
- Choose a sunset reference image.
- Start with the lightest color—yellow—near the horizon.
- Add orange, red, and pink above it.
- Blend the colors using your fingers for a smooth gradient.
- Draw dark silhouettes of trees or birds.
- Add highlights and refine edges.
This gives you a beautiful, easy Oil Pastel Art landscape.
13. Conclusion
Oil Pastel Art is one of the most expressive and joyful mediums to explore. Its bright colors, creamy texture, and versatility make it perfect for beginners as well as experienced artists. Whether you’re blending sunsets, creating textured landscapes, or experimenting with mixed media, Oil Pastel Art opens the door to endless creativity.
Start simple, practice regularly, and enjoy every stroke of color—because Oil Pastel Art is all about expressing your imagination freely.

[…] Next blog Click here Next […]